Table of Contents
What Is A Cat Pacifier?
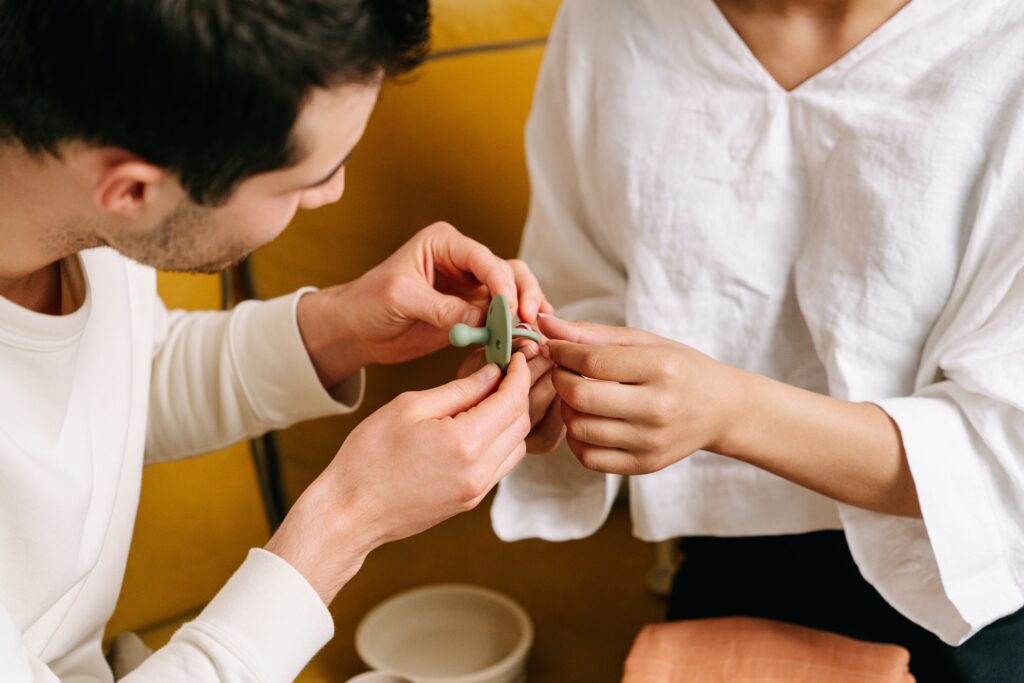
According to the ASPCA, a cat pacifier is a “small, soft silicone or rubber object that attaches to the lower part of a cat’s mouth.” It allows cats to suck on it when they are distressed and it helps them feel safe.
Introduction
Pacifiers are often thought of as a lifesaving item for infants. They help soothe babies when they cry and make it easier for them to fall asleep. But if you are looking to use them for your kittens, there are simple ways to get started.
Have you ever been in a situation where you had no idea what to do for your baby? You can’t find the pacifier, and you don’t have any spoons lying around. What do you do? Help is on the way! This blog post will teach you how to make a cat pacifier for your kittens with items that are readily available at home. To help keep your kitty safe, this DIY project will also be accompanied by safety instructions.
When you’re searching for a pacifier, you usually want to go with something that is soft and has a texture that mimics a nipple. That’s why we recommend using a cat toy or piece of cotton fabric.
To make the pacifier, first, find your favourite cat toy or piece of fabric. I recommend using a small ball because it’s easier to shape than other toys or pieces of fabric. Cut the ball in half with scissors and then carefully remove the stuffing from the centre. This will leave you with two identical balls that are slightly bigger than your baby’s mouth.
Next, take one of the balls and place it inside the other one so that they are sandwiched together tightly surrounded by fluffy cotton. Now take your time to stitch up both sides so that there is no open space for air to escape when your kitty sucks on it. By doing this you will have created a perfect pacifier!
Materials Needed To Make A Cat Pacifier
- A silicone mold
- A piece of knitting or string
- String for the handle
- Scissors
- A ribbon or yarn to tie onto the handle
- A cat toy, like a mouse or bunny
- Paint for decorating the pacifier
- Glue gun and glue sticks
- It’s also helpful to have a hot glue gun and some hot glue sticks on hand.
- You don’t need any other materials for this project except what is listed above. With all those materials, you’ll be able to make your kitty a new pacifier in no time
Safety Instructions To Make A Cat Pacifier
It is important that you take the proper precautions when making a homemade toy for your cat. If you don’t, then you might be putting your pet at risk.
The following safety instructions should be adhered to if you are making a pacifier for your cat:
- If the ball is too big for the kitten, it can cause choking, and potentially suffocation.
- Do not use any materials with chemicals or fragrances in them as this could cause irritation to your cat’s nose.
- Be sure to clean the material before using it on your kitty.
- Make sure that the materials are non-toxic before giving them to your feline friend.
The Process Of Creating Your Own Cat Pacifier
- Find the right material to make a cat pacifier out of.
- Clean your chosen material before you start creating your pacifier.
- Cut the materials you need for your cat pacifier.
- Shape your materials into the shape of a pacifier.
- Use a wire or string to create loops and a handle on the outside of your shape.
- Poke holes in the top of your shape and attach an elastic band around it to hold it together.
- Add any additional embellishments that you think would be fun for your kitties.
- Present the finished product to your kittens so they can enjoy their new toy!
How To Put It On A Cat Pacifier
- Gather all the materials that you will need to make your cat pacifier.
- A pot large enough to fit the length of your cat’s neck
- Scissors
- Sewing cord or yarn
- Hot glue gun and glue sticks
- Catnip, if desired
- A pacifier that fits your cat well.
- Prepare the pot by filling it up with cold water until it reaches halfway up the side of the pot. This will help keep your work space cool and make sure that you do not burn yourself with hot glue. It is also important to make sure that there is enough water in your pot for you to be able to easily pour out any excess water from the bottom of your work area.
- Cut off about a foot of sewing cord or yarn and hot glue it onto one end of the pacifier itself. It doesn’t need to be too long, just enough for your cat’s neck to fit through comfortably. You can cut off more of this piece if you want a shorter pacifier or less if you want a longer one. You may also decide to add additional pieces after this step if you feel like it would suit your cat better than just one
- Cut off about four inches of scissor blades and hot glue them together into a point on either end of the yarn/cord so they kind of look like an arrowhead shape, leaving about two inches at the open end.
Conclusion
In order to make your own cat pacifier, you’ll need a few materials. However, if you’re feeling confident, you can create your own shape and design your own pacifier.
No matter what type of shape or design you choose, the important thing is to make sure it’s comfortable for your cat. By following these steps, you’ll be able to create a unique and personalized pacifier that makes your furry friend feel as comfortable as they can.
Other Articles You Might Enjoy Reading
- When Does Your Pet Need A Cat Muzzle?
- What Is A Cat Perch? Does Your Need
- Cat Stopped Eating Wet Food – Why and What to Do?
- How To Put A Diaper On Your Cat?